Supplies
Plaster bandages (Note: These are bandages already coated in plaster.)
Vasoline
Straws
Aluminum foil
Lots of newspaper
A Bucket of warm water
Towel
Headband to hold up your hair
Metallic Acrylic paints
A friend to help

Instructions
If some inspiration is needed, head over to Death Eater Art.
Sketch out the mask design beforehand, especially if holes around the mouth area are desired.
Find a nice spot on the floor and lay down the newspaper to prevent getting plaster all over the floor.
Get a few globs of Vasoline and rub it all over your face making sure to cover your eyebrows, hairline, sideburns, and any other facial hair well. It can be pretty painful to remove the mask if you forget this vital step!
Unroll some aluminum foil, fold it in half, and squish it over your lower jaw to leave enough room for you to talk behind the mask.
Cut two pieces of straw about two inches long. These pieces of plastic will fit glamorously up your nose, enabling you to breathe while your mask is setting.
Cut the plaster bandages into strips of varying lengths.

Now it's time to put your trust in your friend. You will need to lay on top of the newspapers face-up (might be good to lay on a towel/pillow as the floor can be quite hard, and you'll be there for a while). You friend will take the plaster bandages, dip them in water, squeeze off the excess, and start plastering up your face.

Once your mask is finished, wait another 10-15 minutes before removing it. If you're having trouble, try scrunching up your face, saying the vowels, blinking rapidly, raising your eyebrows, etc. Anything to stretch your skin and get the plaster off. If you haven't rubbed your hairy bits with enough Vasoline, this step might be a little traumatic.
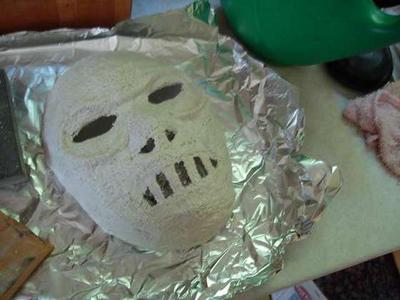
Once the mask is off your face, you can now shape it with the remaining plaster. I added more depth to the forehead, nose, and cheeks. I also added a 'ring' around the eye sockets as seen in some of the official death eater art. Once you're happy with the mask, let it dry overnight resting on a ball of aluminum in case it starts to buckle.
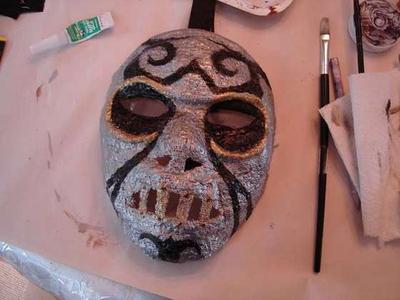
Get out your metallic paints and paint-er-up! This is a stage where it is helpful to have your sketch to refer back to.
Once you're done painting, let it dry. Attach elastics/ribbon to the back using super glue (I needed an anchor above and below my ears, as well as over the top of my head. The mask is a little heavy!).

Grab your longest cloak, blackest gloves and boots, and don your mask! Memorize some curses! Pose grumpily for pictures! Scare small children!!
Also, for added authenticity, henna-tattoo a dark mark on your left forearm!
Final Product

Credit
© Grimsqueaker's tutorial was taken with permission from instructables.com.


