Supplies
Table tennis ball
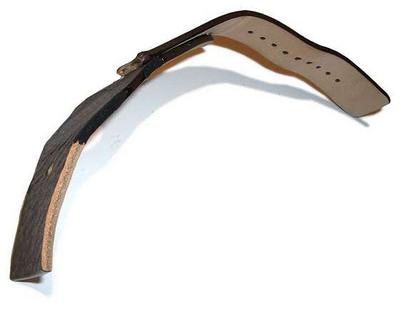
Old leather watch strap
Strip of fabric from an old pair of trousers
A screw
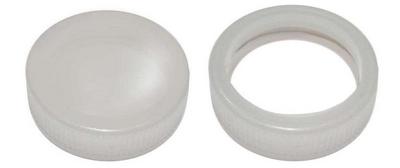
A bottle lid from a ½ gallon (4 pint) milk poly-bottle
Fine grit sandpaper, or a file
Some velcro
Pencil
Permanent Marker
Craft knife
Glue gun and hot melt glue
Scissors
Gold paint
Blue and white paint or felt tip pens
Instructions
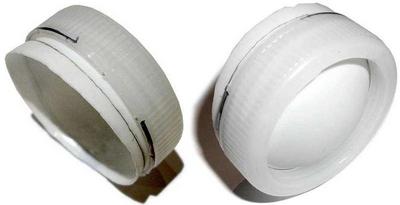
Using a sharp craft knife, cut nearly to the edge of the milk lid and then carve away at the hole carefully making the hole nice and even.
Most caps have alittle rim in the inside to help with the sealing, it's probably easiest if you cut up to this rim.
Finish off the hole with sandpaper or a file to make it nice and smooth, but don't smooth the top of the lid with the sandpaper.
Cut the table tennis ball in half with a crafy knife, minding your fingers.

Put one table tennis ball half in to the cap and use a sharp pencil to draw a line around it. This will provide a cutting guide for making the ball fit in the cap.
Take the ball out of the cap and cut to the line using scissors.
Gather the watch straps, fabric scrap and lid.
Lay it out so that the straps go off at an angle as if it were a clock at between 10 and 5 to 3 o'clock.
Draw around the straps and the lid with a permanent marker.
Draw the lid curve on the ends of the straps.

Cut out the leather strap parts using scissors.
Also trim the straps at the EYE END, with a slight curve as you marked previously, and cut off the watch buckle.
Now offer the pieces up together again and trim off any parts that look messy or don't quite fit.
Check that you have a nice angle between the two strap parts.
Do NOT glue it together yet.

Paint the ring gold.

Paint a light blue acrylic circle slightly off center on the ball half, taking care to make it nice and evenly round.
When that has dried, lightly paint on some white acrylic lines radiating out from the center but not all the way to the edge to make it look like an iris.
Lastly paint or permanent marker on the pupil.

Using permanent marker, color in the cut edges of the leather black.
Offer the eye and ring up to the leather and glue the straps in place, but don't glue the ring and eye on yet.
Using the glue gun, glue the eye ring with the eye inside it on to the leather.

Cut the strip of fabric into a long strip big enough to go around your head and about twice as wide as the leather straps.
Fold one half over and then the other over so that the cut seam was down the inside and glue them over each other to make a sort of tube.
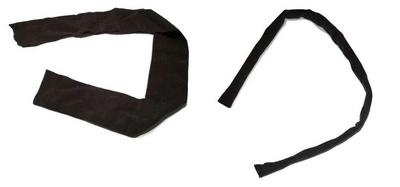
Cut the end of the leather straps and glue the fabric tube ends around them so that the joining will be strong.

Once the straps are joined up at both ends, cut them roughly in the middle and wrap them around your head.
Put the mad eye on and pull the straps as tight as you want them so that you can feel the overlap.
Holding the overlap between thumb and forefinger and being careful not to let it slip, slide the eye off of your head and mark across both strap ends, where they should be overlapping for a good fit.
Trim the ends of the straps to about 1 inch (2.54 cm) past the line you have drawn and make a neat end.
Finish off the end with a dab from the glue gun.

Glue the velcro in place at the end of the straps.

Make a small hole in the ring around the eye with the sharp point of the craft knife. This doesn't have to fit the shaft of the screw, it just acts as a key for the glue.
Using the glue gun, glue the screw in place.
Author's Note: Make sure that your screw is the right length, cutting it with a hacksaw if necessary.

Final Product


Credit
© Chris Barnardo's tutorial was taken with permission from dadcando.com.


