Supplies
Computer with Photoshop, or a comparable photo-editing software, installed on it
Time
Patience
Instructions
Find a picture of the movie poster that you would have liked to be part of.
Make sure it is the biggest size and resolution possible. If making a poster out of it, then it will need to be at least 1000 pixels wide and possibly more. If it is only for the web, then probably no more than 500 pixels wide is fine.

Trying to match the lighting and the angles as closely as possible,take a photo of yourself or your model.
If the original picture was taken outside, then you have to do it outside really as the quality of light is so different and it makes it much harder to merge the tow images if they were taken under dramatically different light.
If the original was at night, then take your at night.
Try to get the light coming from the same angle. This is very simple to achieve, and worth paying attention to.
If you are only going to be dropping your head into the image then it doesn't matter what you are wearing as long as there is enough neck visible to be able to drop it in the image at the right angle.
Remember that not only should you be looking the right way and standing at roughly the same angle, but that the camera should be positioned so that the image looks in the same proportion as the one you want to drop into.
Look at the eye lines, look at the horizon line. The horizon line is not always visible in a picture, but it is always there. Above it lines and things arranged in the z axis of the image appear to go down towards it, below it, those same things appear to go up to it.
Author's Note: Imagine that you are looking at a book case. At your eye line you can't see above or below the shelves, but for the ones above your eye line, that you are looking up at, you can only see their undersides; and for the ones below your eyeline, that you are looking down at, you can only see their tops. So, in the photo you take, make sure that you or your model are arranged so that the horizon line of your photo matches that of the base image.
Act up the part, scowl, say cheese or generally try and look like you are in the scene and mean to be there, acting is half of the fun and half the battle to making it look real. Use a mirror if you need to so that you can see how good you look.
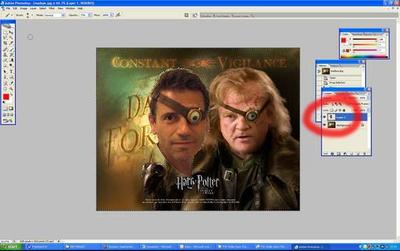
Using the lasso tool, so a rough cut so that you can drop it into the base image and move it about to see if it is about right. If it isn't, then you can always take another picture, rather than waste time cutting carefully round and finding it looks wrong when it is positioned.

Drag the rough cut out of you into the base image. It will probably come in on a new layer, depending on what photo-editing software you are using, but you might have to make a new layer and copy and paste the cut out into the image.

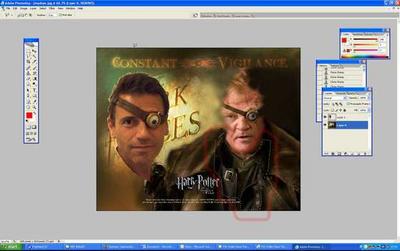
With the two parts of the image on separate layers, resize the rough cut of you to make it fit the base image.
Measure by eye the height of the head or some other prominent feature to make sure that the rough cut looks the right size. This is a visual thing so resize until it looks right.

Use hue and saturation to adjust the colour and the intensity of the rough cut to match the base image. Often digital cameras taken nice saturated images but pictures from films have been graded to desaturate slightly, or if it is a picture of a big structure the image may be desaturated by distance haze.
You might have to add "noise" to the rough cut or "blur" it slightly to make it look more in keeping with the base image.
Change the hue slightly if you have to. All you are trying to do is get it to match the background. Often film and live action shots are slightly blurred or grainy, so take your time to make it blend in.


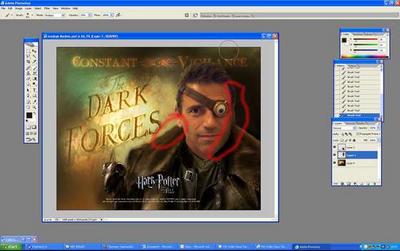
Using the lasso carefully and slowly click round the image to be cut out.
Use straight lines because they are easier, but use very short lines so that you can follow the curves.
Pay attention to hair, and don't take too much off. Ideally you will have shot the image on a back ground that has a similar colouring, which is very important for hair and the like.
Be patient, paying attention to detail. If you can set the cutting tool to have a slight feathered edge, 1 or 2 pixel blur, then do so. This will make the edge a little less distinct.
Author's Note: Don't worry about things appearing in the background that should be in front of the image right now, they will be moved to the top in a later step.
Zoom in on the image to make sure that it is cut out neatly.
Once the image is outlined with the masking tool, delete the background from your image.
Author's Note: At this stage the cut out may not be perfect and the odd bit of the old back ground might show, especially on the hair. It will be blended later.

Once the image is cut out properly, move it to one side, still on a separate layer.
Use the clone and patch tool to clone the base image background over the image you are replacing with your own to see that the new image will cover everything that is left.
Slide your image back and forth until it is clear that you cannot see any of the original image when it is in position.

Author's Note: If there is a part of the image that you need to be behind (a lamp post, a fence, another person in the line up or a car are some examples) then it is important to make it look like you are behind these things.
Cut and copy any images that you need to be behind onto a new layer. The original image is there and you only have to cut carefully where the actual thing goes in front of you.
Author's Note: If you are leaning up against a lamp post in the image and a bit of you is behind the lamp post, you only need to cut out the bit that you are behind and copy and paste that bit.
Reorder the layers so that (layer wise) your head is behind anything you are using from the main image, but on top of the back ground image.
Position your image exactly in the right place.
Author's Note: If you think that the size isn't right or that the colours are not quite right now that it's in position, then you can still adjust these as it is still on a different layer.

If the edges of your image stand out, go around the edge of the cut out layer with a small size eraser set to about 30% to 50% intensity, carefully nibbling away at the remaining hard edge color.
Author's Note: If you are doing this close up, be careful to check regularly by zooming out because it is very easy to do something that looks ok close up but looks very bitty and ragged from a normal viewing distance.

Add some shadow, if needed, by airbrushing black at 10% intensity using the colour "Overlay" setting on the brush so as not to obliterate any of the image features.
Author's Note: Shadows are important and they often give away a fake. Take time to consider the shadows. If you have got the lighting of your image right, then most of the shadows should be right.
To add shadows, make a new layer and use the lasso mask tool with straight lines to draw the shadow. This might take a bit of practice, so it really helps if you have a shadow in your taken picture to trace round.
Then airbrush over it with black set on 10 or 20% intensity. Shadows tend to be darker nearer the object and more blurry farther from the object. When you are happy use a blur tool to make the edge of the shadow a bit more blended.
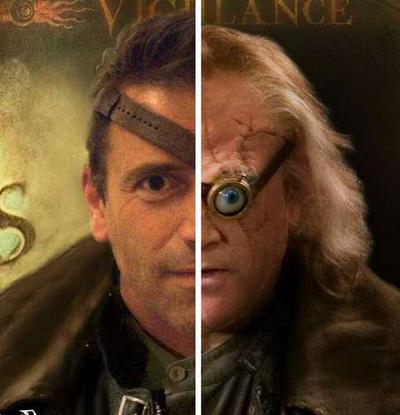
Final Product

Credit
© Chris Barnardo's tutorial was taken with permission from instructables.com.


