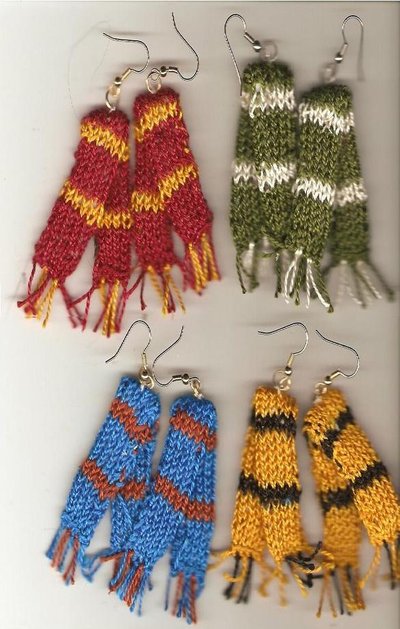
Supplies
Size 5 perle cotton in the house colors of your choice
US 0 (2.00 mm) needles
2 pieces of 3/4" x 3 1/2" (1.91 cm x 8.89 cm) lightweight interfacing
Sewing needle
Thread
Straight pins
2 split rings or jump rings
2 earring hooks or studs with attached rings
Small pliers (to open hooks & add rings)
Clear nail polish
Tapestry needle
Instructions
Cast on 10 sts in main color (MC), using a non-stretchy cast on method.
Pattern
*Row 1: Knit.
Row 2: Purl.**
Repeat from * to ** 2 additional times, for a total of 6 rows in MC.
Join contrast color (CC).
Repeat from * to ** 1 time.
Repeat the pattern, remembering to switch between MC and CC, until there are 5 MC and 4 CC repeats.
Bind off using a non-stretchy bind off method.
Break the yarn, leaving a tail long enough to sew the long sides of the scarf together.
Fold 1 piece of interfacing in half. and slide it inside the folded scarf.
If
needed, trim it to fit. It doesn't have to go all the way to each end.
It's used to give the scarf some stability and to give you something to
sew on when you finish the scarf.
Using straight pins, carefully
match the stripes and pin through both sides of the scarf to hold it
closed while you sew it shut.
Use a simple running stitch up the long side of the scarf, then knot off and push the tail inside of the scarf.
Be sure you enclose all the tails & edges inside so the construction doesn't show.
Add fringe in both colors, alternating MC and CC.
Author's
Note: If you have matching shades of embroidery floss, that would give
you a softer fringe, and you might be able to add more fringe than I
could.
Fold the scarf in half at an angle.
Place
your first stitch into the scarf with your needle & thread about ½"
(1.27 cm) down from the center top, taking care that you do not split
any of the perle cotton and making sure that the knot is hidden
underneath the scarf stitches next to the interfacing
Make one
or two stitches to hold the scarf at an angle, always going between the
stitches of the scarf and never over or through them.
Slip the needle back up to the folded edge of the scarf.
Do not cut your thread yet.
Open the loop at the bottom of the earring hook and slip the split ring on.
Reclose the loop with the pliers.
Author's
note: If you are using a stud finding with a loop on it for hanging,
you'll need to slip the stud loop onto the split ring because those
loops usually don't open, and if you do open one, you weaken it
seriously.
Now place the split ring at the center top of your scarf.
Making sure that the side you like the best is facing the front, sew the ring onto the scarf with 2 or 3 stitches.
Knot off, making sure that the knot slides up right next to the thread.
Using the tip of a straight pin, place a tiny dot of clear nail polish on the thread to lock the knot.
Author's
note: Be careful - try not to get any on the perle cotton as the polish
can cause a color change as well as creating a hard spot when it dries.
You want that on the knot of the thread, not on your scarf.
Final Product
Credit
Staarrkatt's tutorial was taken with permission from ladyfelula.blogspot.com, and can also be found in her Ravelry projects.


