Supplies
1 photo album
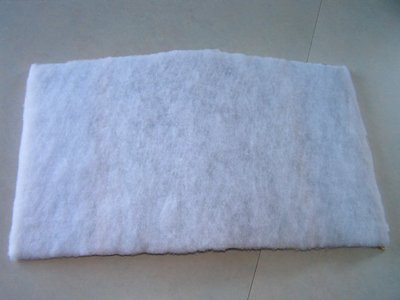
Padding
Fabric
Ribbon (preferably matching the fabric)
Sewing scissors
Mod Podge glue (or similar)
Hot glue gun
Sponge brush
Instructions
Take your album and measure the fabric & the padding according to its dimensions. The fabric piece you cut should be larger than the photo album (see Figure 1A). You can take your fabric dimensions and try to figure out how to best maximize its use. Please note that the larger is the fabric piece, the easier it will be for you to work with it. In the picture, the fabric is merely 3/4" (1.91 cm) larger than the album on each side. To get you started, you can consider having an extra 1½" or 2" (3.81 cm or 5.08 cm) on each side. That would mean the fabric dimensions need to be 3 to 4" (7.62 cm to 10.16 cm) larger than the album. As for the padding dimensions, it should be about the same size as the album. If you wish, it can be a little larger (see Figure 1B).


Take the padding and add a little bit of hot glue on the album so that it will hold easily. If you have cut the padding a little larger than the album, you will also need to glue it all around the album inside using hot glue. Should you feel there is a little too much padding inside, simply remove the excess with your scissors.
In this case, there are two options, depending on your fabric dimensions:
- If your fabric is not much larger than the photo album, you will need to use hot glue to stick the fabric to the inside of the photo album (see Figure 3A).
- If, on the other hand, you have a couple of inches of fabric on each side of the album, Mod Podge glue will work best (see Figure 3B). It is possible that the fabric will come higher than the metal bindings. In that case, you will need to cut the fabric around them, but as close to them as possible.
In any case, center the photo album on your fabric. Start gluing the fabric on the right side of the album, where the photo pages will eventually be. Your first attempts will usually not be as nice looking as the others, so the photo pages will hide those little imperfections. Also, start gluing the width before the length. It is smaller, so it will make things easier for you. Once you have glued the right side, start gluing the left, making sure to pull on the fabric, so that once you are done, it's all tight. Glue the length similarly.
Now the fabric is glued all around the inside of the album, we will take care of the corners, which, as you have probably noticed, are a little odd looking at this point. To correct that, you will first need to diagonally cut (from the corner toward the center of the album) the excess fabric using sewing scissors. Second, using hot glue, glue one side of the corner, then the other (see Figure 4A). Once you have done that, add a little bit of glue in the hole created by the fabric on the corner of the album (see Figure 4B), then press the fabric down on the album. The glue will of course be very hot, so consider using a knife to do this to avoid burning your fingers.
Take the ribbon, add a little bit of glue on it (see Figure 5A) and fold it over (see Figure 5B), so that it the ribbon will not get damaged. Measure the ribbon you will need to cover the diagonal corner of fabric, and cut the ribbon just a little longer. Repeat the step with the other end of the ribbon. Then, glue that piece of ribbon diagonally on the uneven fabric, using hot glue once more (see Figure 5C). Repeat for each album corner.
To outline the inner part of the fabric with ribbon, you will need to glue the end of the ribbon similarly to the way you have done it at the previous step. The only difference is that you will need to glue the end in a 45° angle (see Figure 6A). Using hot glue, start gluing the ribbon on a corner and proceed all around the album. Never cut the ribbon on corners. Simply fold it, making sure you glue all parts of the fold, then proceed to gluing the other side (See Figure 6B). If you previously had to cut your fabric around the metal bindings, you will also need to outline the fabric there with ribbon too. Outlining the fabric with ribbon like that will hide the uneven fabric and add a nice touch.
Last, but not least, we will add a piece of ribbon so you can tie the album shut. To do so, repeat the beginning of step 5 to protect the end of the ribbon from getting damaged. Make sure you leave a good length of ribbon so you can actually tie a bow without any problem. Find out the center of the album, and put some hot glue in a horizontal line (see Figure 7A), both on the album and on the fabric. Press hard on the ribbon to make sure you stick it properly. Repeat on the other side of the album.
Final Product
You can of course change the fabric and you will have a completely different album. Find some baby fabric and it will make a perfect present at a shower! Buying fancier fabric could work perfectly for a wedding or an anniversary. Make albums with old t-shirts that have some particular meaning, such as Spider-man fabric for your little cousins. The possibilities are infinite!
Credit
© Josée Leblanc's tutorial was taken with permission from HarryPotterCrafts.


