Supplies
Harry Potter picture
Plain white paper and envelopes
Color printer
Word Processor (instructions are given for Microsoft Word)
Instructions
Paper
Select a Harry Potter picture you like. If the picture is wider than it is tall, change the page setup in your Word to “Landscape” (you can do so by selecting File > Page Setup > Landscape). However, it is best if you select a picture in portrait format. While you are in the Page Setup section, set the margins as low as possible (the numbers will differ depending on your printer).
Copy the picture into the word processor software.
If the picture toolbar doesn't appear automatically, point your cursor where there are no icons in the upper toolbars (usually there are blank grey spots on the right), then right click and select “Picture”
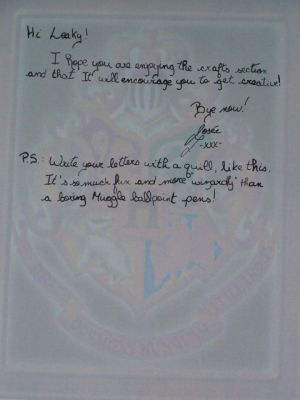
Click on the icon called “Color”, then select “Washout”. Ajust the brightness and contrast if necessary.
Print the page using a color printer, making as many copy as you want or need.
Envelopes
Resize your picture to a small format and copy it.
Select Tools > Letters and Mailings > Envelopes and Labels > Add to document. An envelope should appear right before your paper.
Paste your picture in the top left corner (for the return address only), in the center of the envelope (where you would put the mailing address), or even on the whole envelope.
Print as many envelope as you'd like, making sure to select “Print current page”
Final Product
Credit
© Josée Leblanc and Kyrane's tutorial was taken with permission from HarryPotterCrafts


