Supplies
Fairly stiff black felt or fleece fabric
Gold felt or fabric
Contrasting felt for "H"
Measuring tape
Scissors
Tailors chalk, or other light colored writing tool
Black thread
Needle, or sewing machine
Hotmelt glue and glue gun, or more thread to attach the crest
Instructions
Using the tape measure, measure the circumference of your head where you want your hat to sit.
Take the measurement of the circumference of your head, multiply it by 4 and plug it into the equation for finding the circumference of a circle (2 pi r=C). (See Figure 1).
Take the measurement you get for R the Radius and add an inch (2.54 cm) or so for your seam allowance.

Apply your measurements to the fabric.
Measure whatever your R + 1" (2.54 cm) measurement is down each side.
Author's Note: By making your angle greater than 90 degrees the hat will have a better shape.
Use your measuring tape or a piece of string to make a compass to draw on your hat's outline by holding the chalk against one end of the string in one hand, pinning the other end of the string to the tip of the hat with your other hand. Swing the chalk from one measurement mark to the other in a curved line.
This creates the line for the base of your hat. Cut along this line.

Choose an inside and outside for your hat. Write on the inside so you know which is which. Fold your hat in half with the inside facing out.

Pin up the straight side, and try it on your head for fit, watching out for the pins. If the fit is wrong, make your changes now.

Use your machine, or sew by hand, and make one straight seam up the side.
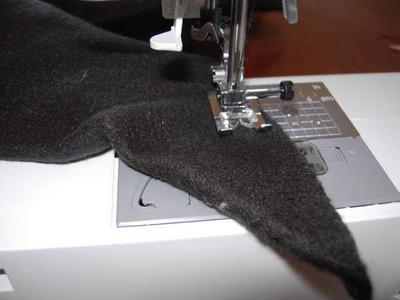
Author's Note: If you want your hat a little shorter, with a more rounded tip, angle the seam in a bit towards the top. (See Figure 6)
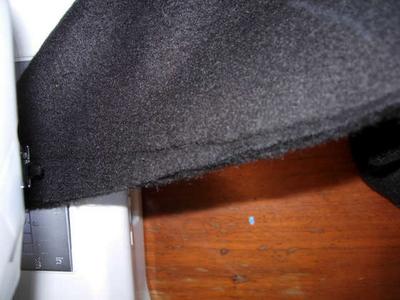
Cut the extra fabric next to the seam so that your hat is not too bulky, leaving ¼" (0.64 cm) for a seam allowance.
Turn your hat back right side out, and poke a pencil into the tip to turn the tip all the way out.

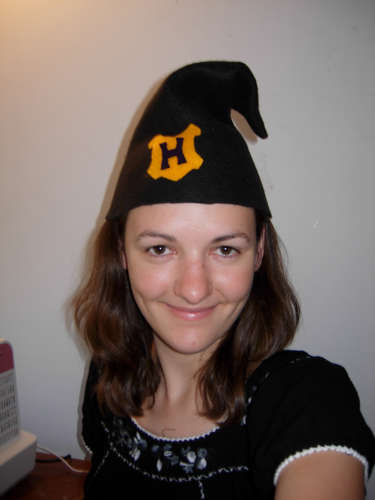
Use the gold felt to cut out a shield shape, which you can freehand or print one out and trace it. Cut out a letter "H" in the darker color, or even an animal to represent your house.

You can sew, or glue these on to the front of your hat.
Final Product
Credit
© Robyntheslug's tutorial was taken with permission from instructables.com.


