Supplies
Clear or colored flat glass marbles
Aluminum foil
Sharpies, or permanent markers, in colors that you like
Polymer clay
Clay tools
A glass pan
Instructions
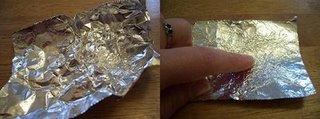
Tear off a small square of aluminum foil. If you want a solid look to your stone, leave it smooth; however, if you would like more color variations wad up the foil several times, then press down to flatten the creases or smooth it out.
Add color to the glass stones by using your permanent markers to color the shiny side of your piece of foil and the flat back side of the glass stone you are using.
If you'd like a more colorful stone, swirl together different colors and experiment with the results.
For more variations, dab clean foil against the coloring while it is wet to bland the colors together, or blot the colored portion with paper to remove heavy color.
Another way to create a swirled or varied coloration is to add other colors and patterns in permanent marker on the flat part of the glass stone. When the foil and stone are put
together, you'll combine both effects for a unique look.
Allow the marker to dry completely on both the foil and glass.
Author's Note: Be warned that the different colors will bleed together onto the tip of the markers, and you will have to clean the tips by scribbling on a piece of paper until the bleeding wears off.
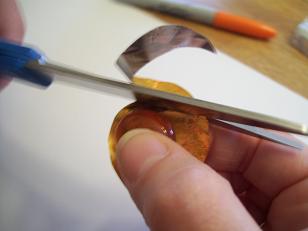
Place the glass marble against the colored side of the foil. Cut a circle out of the colored foil that is a little larger in diameter than the base of the glass stone.
Center the stone on the foil and press the overlapping edges up the sides. Press the folds flat against the stone.
Make a circular base that's large enough to accommodate the stone.
Carefully press the stone and the attached foil onto the base, making sure that the clay conforms well to prevent air voids.
Make a rope to encircle the stone or press down little balls of clay around
the stone, anything you can think of that will hold the stone in place.The foil and stone will not stay stuck to the base without something holding them on, like the setting in jewelry. The main goal
is to embed the stone in clay well enough so it cannot fall out; however, you also want to cover the sides of
the stone to hide the foil and coloring work.
Embellish the clay piece however you'd like. If you want it sewn on or used as a necklace medallion, make the appropriate holes in the clay prior to baking.
Place on a glass pan and bake your clay piece as instructed on the packaging of the clay.
Author's Note: I will warn you that the marker can smell a little when baked; but, if it's done properly, the marker coloring will be enveloped in clay so it's not necessarily noticeable. Many people use these same markers on shrinky dinks which are also oven baked. However, I cannot attest to the fumes' safety so do so at your own risk. Bake in an oven dedicated to clay work if you have one (toaster ovens work well) and ventilate if possible.
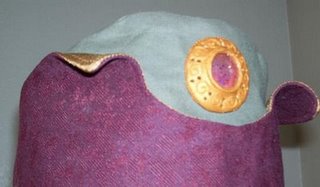
Final Product
Credit
SM Radtke's tutorial was taken with permission from craftasticworld.blogspot.com.


