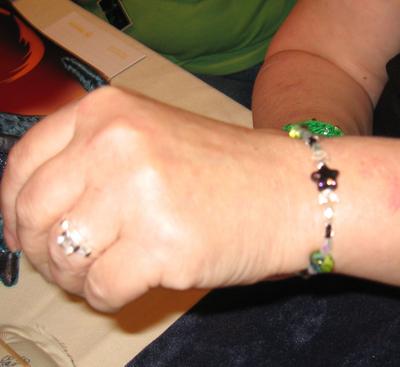
Final Product
Supplies
Beads
Beading wire (transite cord or soft-flex are recommended)
2 crimp beads
2 jump rings
1 clasp
Small chain nose pliers (some people might use want to use two depending on hand strength)
Wire snips or scissors
Crimping pliers (optional)
Bead board/bead mat (optional)
Masking tape (optional)
Instructions
Cut the wire
Cut a piece of wire/cord that is the length of the finished piece plus 5" (12.7 cm). So if you are making an 8" (20.3 cm) bracelet, cut a piece of wire that is 13" long (33 cm).
Plan the Design
Using your bead mat or board, lay out the beads to plan your design. If you lay it out in a straight line it will be easier to measure as well as to make sure that you have enough beads to complete the design that you would like to have. If you want to check out the design "in action" just string it on the wire making sure to keep the beads from sliding off.
If you want to be certain of having a symmetrical piece, but are not sure how many beads to use, you will want to string the middle bead first then add beads alternating sides (first the left side then the right for example) until the design is complete. It will be a little trickier because you'll have to watch out for the beads falling off, especially doing the first crimp.
Also, you may want to use a bit of masking tape on the ends when you are handling to save on having your lovely design sliding right off into your lap.
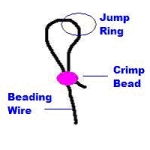
Add Jump Ring
Slide a crimp bead and one jump ring onto the wire. Loop the wire around the jump ring and slide the end back though the crimp bead. Take your time, it is awkward when you first try it.
Now pull the crimp bead tight against the jump ring. You can use just your fingers or get some leverage with the pliers if you need additional help. Once you get the crimp flush against the jump ring while still being on the wire flatten the crimp bead with the tip of the pliers so it stays.
Try to make sure you have squished the entire bead flat. This does not take a great deal of strength, slow and steady pressure is the way to go. Then, trim the loose end of wire to ½" (1.3 cm).
You should have something looking like this:

String the beads
String the beads on the wire; this is the really easy part. Remember that little loose end of wire down by the crimp bead? Slide it into the first few beads. That will keep it from scratching your arm/leg/or neck.

Attach the Second Jump Ring
The process is the almost the same as the one you just finished. The exception is you will need to pull everything snug so that there isn't any slack (exposed wire) in the necklace. The easiest way of doing this is to hold the unfinished end of wire up and let gravity pull all of the beads down toward the finished end.
Attaching the Clasp
Take the pliers and twist the jump ring open. DO NOT pull the ring open. You do not want to make the opening wider. Twisting one part up will keep the opening the same size but will let you hook the clasp on. If you pull the opening wider you will never be able to get the ends back together well enough that the clasp will be secure.
Once this is completed, hook one part of the clasp on the jump ring, then twist it back so that the ring is closed again.
Repeat again for the second part of the clasp.
Congratulations! You've just completed your first design!!!
Credit
Elise's tutorial was taken with permission from her LiveJournal.


